
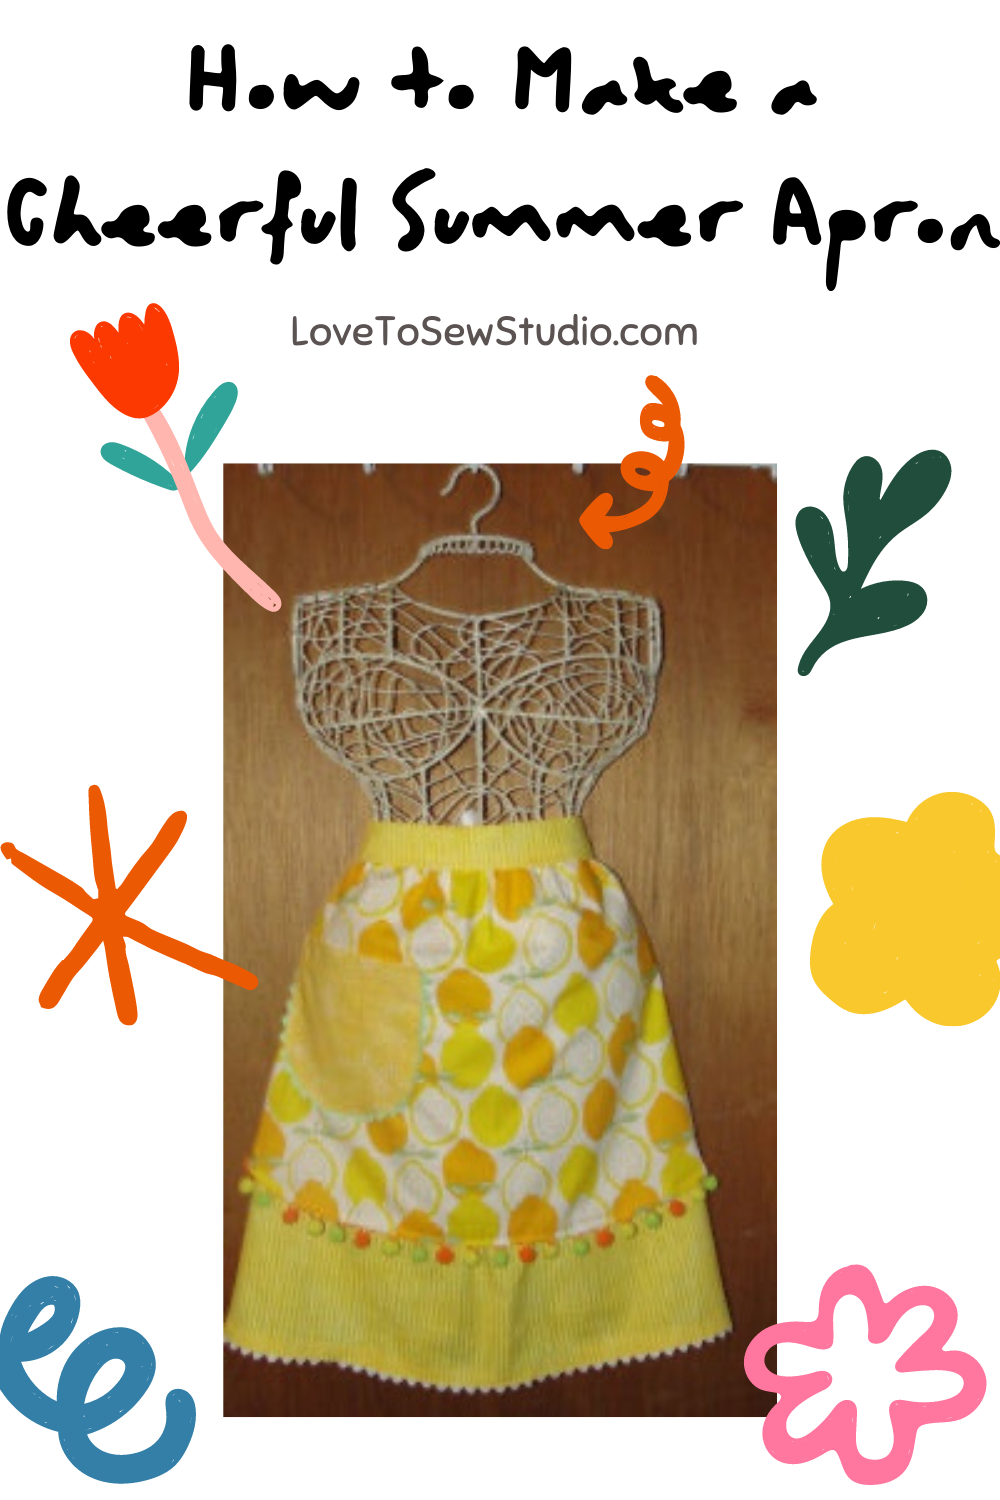
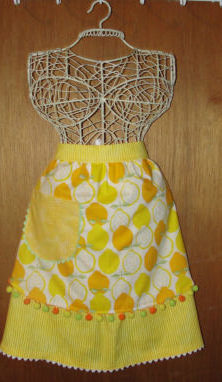
Do you love baking and cooking especially in the summer time? This lemon apron is full of bright and cheerful color and will be perfect for your to make for your summer time experiences in the kitchen! Thanks so much to contributor Fran Ragno for picking such an excellent choice of fabric and trim. She says she couldn’t help herself with the fuzzy balls, they reminded her of sherbet. She thought the colors were fun and reminds her of summer; hence our Cheerful Summer Apron was made.
This post contains affiliate links. You can read my full disclosure HERE.
YOU WILL LOVE THIS BEAUTIFUL COLORFUL APRON! HERE IS THE MEASUREMENTS FOR YOUR APRON:
- Apron – 28″ X 19″
- Overlay of Apron – 28″ X 15″
- Waistband – 19″ X 4.5″
- Pocket – 7″ X 7.5″
- Ties: if using ribbon cut two 38″ pieces, and if using fabric cut two 38″ X 6″ pieces
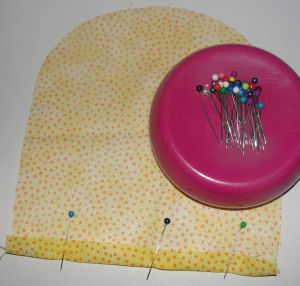
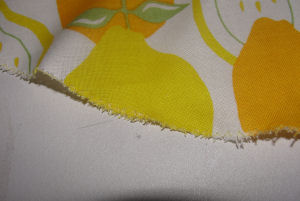
Summer Apron – Step 1
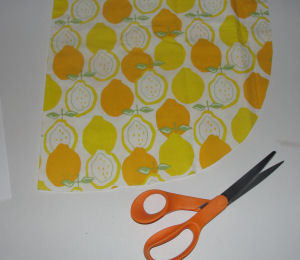
First fold the overlay in half matching the 15″ sides. On the 15″ sides near the bottom, round off the bottom as shown in the photo. If desired do the same for the apron piece.
Summer Apron – Step 2
Create the same curved edge for the pocket piece as you did in the last step. Do this by folding it in half and curve the bottom edges.
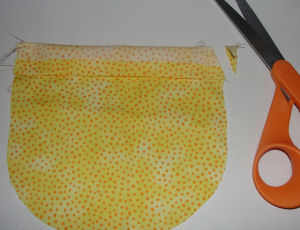
Summer Apron – Step 3
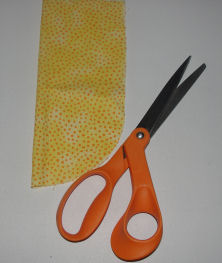
Then you are going to fold the top edge of the pocket to the wrong side of the fabric 1/2″ as shown.
Stitch in place using your pressure foots edge as a guide.
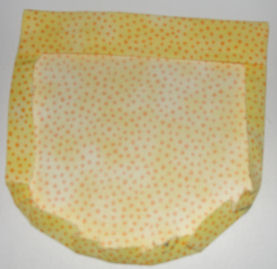
Summer Apron – Step 4
Place the pretty side of the pocket up on a flat surface. Fold the top edge down toward the pretty side 1.5″ as shown in the photo. Press your pocket and stitch both ends of the top of the pocket pressure foot edge. Then clip the corners of your pocket making sure not to cut your stitching.
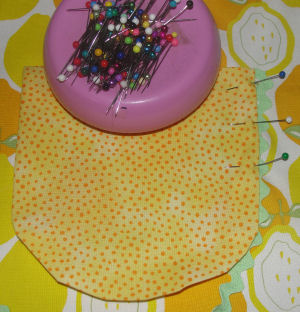
Summer Apron – Step 5
Now turn the top edge of the pocket pretty side out. Press the top edge flat. Press around the “U” of the pocket 1/2″ under towards wrong side of fabric as shown in the photo.
Summer Apron – Step 6
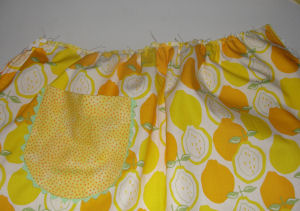
Place the pocket where you want it on the pretty side of the apron overlay. Most people tend to put the one pocket on the left side middle of the apron.
Adding some rickrack is optional but if you are place and pin rickrack under the pocket as shown in the photo making sure that 1/2 of the rickrack sticks out.
Next stitch around the pocket “U” shape close to the edge making sure you catch the rickrack as you sew. This step attaches your pocket and adds the rickrack at the same time.
Summer Apron – Step 7
Whether you are making this apron for a decorative piece to add in your kitchen, or to be used while you cook, you will want to seam finish your edges. Seam finishing stops your edges from fraying, making a more professional look and longer lasting life to your apron.
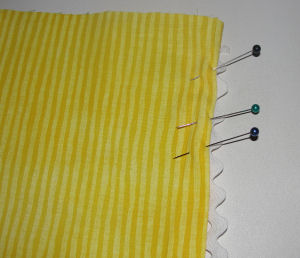
Zigzag seam finish around edge of the “U” part of your apron piece and your overlay apron piece as shown in the photo.
Summer Apron – Step 8
Then you are going to pin the trim of your choice (fuzzy balls, lace, ribbon, or rickrack)on the outside of the “U” shape of the overlay. Stitch it in place all the way around the edge of your overlay using the pressure foot as your guide.
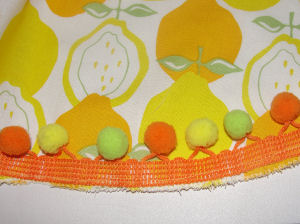
Summer Apron – Step 9
Turn overlay to pretty side up and fold and pin as shown in photo. Stitch in place along the edge of the folded fabric.
Summer Apron – Step 10
Press the “U” part of the apron 1/2″ to the ugly side of the fabric as shown in the photo.
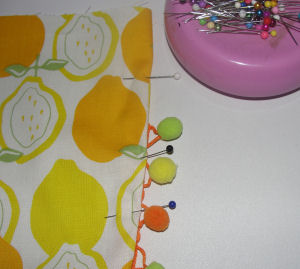
Summer Apron – Step 11
Now pin the trim of your choice under the pretty side of the folded “U” edge of the apron. Stitch the trim in place.
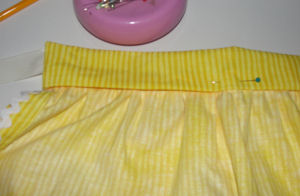
Summer Apron – Step 12
Place the overlay pretty side up on top of the apron’s pretty side up. Pin the top of the two layers together and gather the top edge of both together.
Summer Apron – Step 13
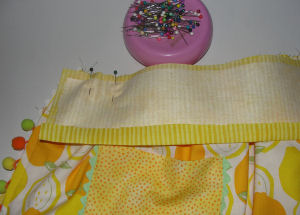
Next add interfacing to the waistband according to the package directions. Press one long side of the waistband 5/8″ to the ugly side as shown in the photo.
Pin the long raw edge of the waistband to the gathered edge of the apron. Adjust the gathering to fit the waistband.
Make sure the waistband is hanging over about 1/2″ on each side and stitch in place using the pressure foot edge as your guide.
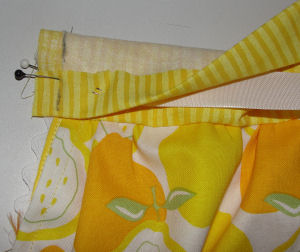
Summer Apron – Step 14
If making tie ends from fabric, fold one tie end in half by placing the long ends pretty sides together. Pin. Stitch the long end and one short end. Turn pretty side out and press flat.
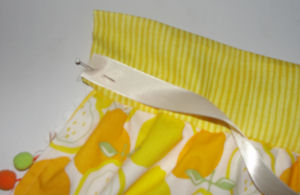
On the pretty side of the waistband place the ribbon or the raw edge of the tie end as shown in the photo. Stitch in place.
You will want to keep the ribbon or tie end at the bottom half of the waistband. If the tie end made from fabric is to wide add a pleat or tuck in the center of it.
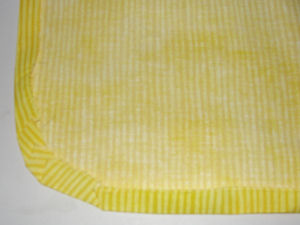
Summer Apron – Step 15
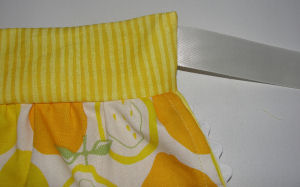
Fold the waistband in half as shown in the photo. Stitch 1/2″ seam as shown on the photo with the drawn line. Turn the waistband pretty side out. Press nice and flat.
Summer Apron – Step 16
Finally pin the waistband in place on the wrong side of the apron and hand stitch or tack in place.
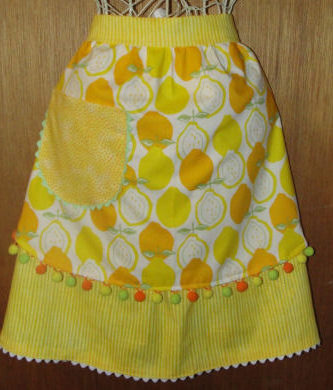
Your cheerful summer apron is done. Send us a photo, we’d love to see it!

PIN IT FOR LATER


Leave a Reply