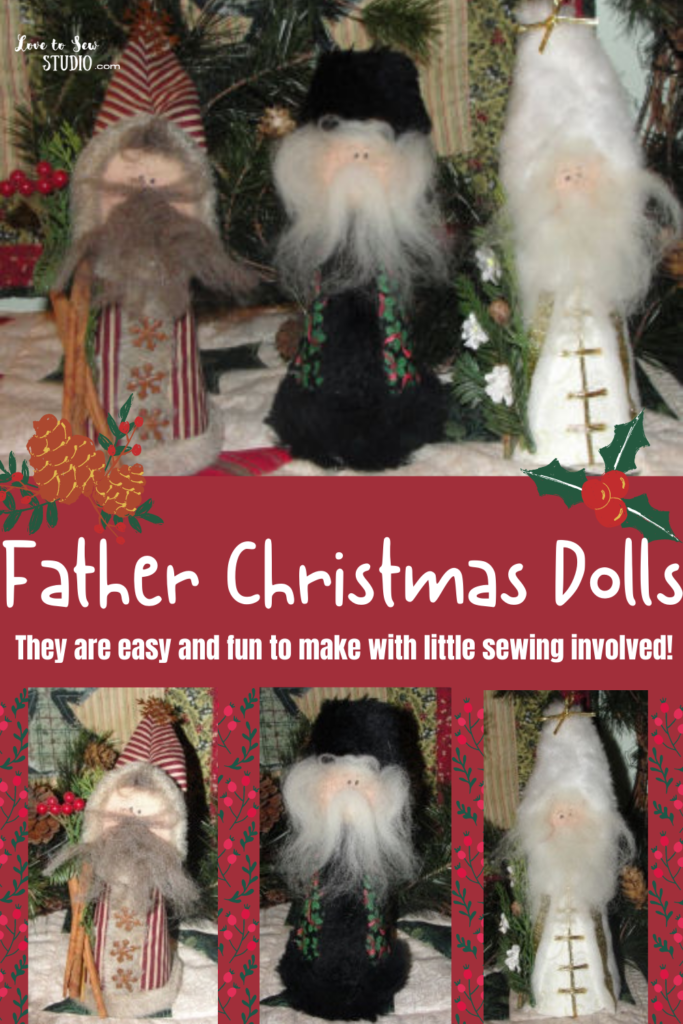
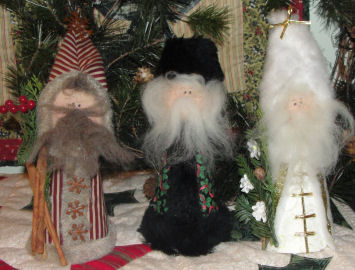
Get your home ready for Christmas with these beautiful Father Christmas Dolls. The best part about these dolls is that anyone can make them because there is no sewing involved! You can easily make these dolls that will look great anywhere in your home this holiday season. Each of our Handmade Old World Father Christmas Craft Dolls represent a Country and are Given a Name and Story. They also make great presents for the Old World Santa lover in your life.
This post contains affiliate links. You can read my full disclosure HERE.
ADORABLE FATHER CHRISTMAS DOLLS FOR YOUR HOME! HERE IS WHAT YOU WILL NEED TO MAKE THEM:
- cardstock paper x3
- small scraps of red, green, and black print fabric
- cream fabric for face (or use a wooden ball for Santa face)x3
- scraps of black faux fur
- white doll hair
- small scraps of red and cream stripe fabric
- tan faux fur
- grey doll hair
- small rusty snowflakes
- greenery with red berries, cinnamon sticks
- small scraps of cream fabric
- scraps of white faux fur
- basic craft supplies: stuffing, black marker, fabric glue or hot glue, needle and thread
Father Christmas Dolls – Step 1
For all three of your Christmas Dolls you are going to start them the same. First cut a 8.5″X11″ cardstock piece of paper in half.
Father Christmas Dolls – Step 2
The next thing you are going to do is fold the piece of cardstock so that it creates a cone shape. Tape or staple the done in place and cut the bottom off of the cone so that it stands flat.
Father Christmas Dolls – Step 3
Then you are going to use the bottom of the cone to create a circle on beige fabric for the Santa face. If you do not want to hand sew or machine sew you ca purchase a wooden ball for the face.
Father Christmas Dolls – Step 4
Unless you’re using a wooden ball for the face the next thing you are going to do is place fabric pretty sides together and hand stitch or machine stitch around the outer edge of circle. Leave an opening for turning. Turn face pretty side out and stuff.
Father Christmas Dolls – Step 5
After stuffing your doll face you are going to use a black marker to draw on your dolls face. Use a makeup brush to add blush to your dolls face. Repeat these steps for all three of your dolls.
Viktor Claus Doll – Step 1
Now it is time to start working on all the different dolls. The first one is Viktor Claus. Viktor Claus is our handmade Old World Father Christmas Doll from Russia; Ded Moroz means Grandfather Frost. You are going to glue the head of your doll to the cone. Then cut an 8″X4.25″ piece of fabric for Santa coat. Drape coat over cone and glue in place. Cut an excess fabric from bottom.
Viktor Claus Doll – Step 2
Now you are going to add some faux fur. Cut a 1″ strip of fur and glue down the center front of Santa body. Cut a 1.5″ strip of fabric and glue at bottom of Santa doll body sandwiching the body between the fur on a fold.
Viktor Claus Doll – Step 3
Next cut a 3″ X 5″ piece of black fur for a hat. Fold the fabric in half and glue it in place.
Viktor Claus Doll – Step 4
Wrap hat around the Santa face and glue in place over lapping the hat in the back.
Viktor Claus Doll – Step 5
The last thing you are going to do for your Viktor Claus Doll is glue his hair and beard in place.
Santa Claus Doll – Step 1
Now we are going to start our second Father Christmas Doll which is Santa Claus from the United States. The first thing you want to do for your Santa Doll is glue the face onto the cone. Then cut an 8″X4.25″ piece of fabric for Santa coat. Drape coat over cone and glue in place. Cut an excess fabric from bottom.
Santa Claus Doll – Step 2
Now you are going to cut a 1″ strip of fur and glue down the center front of Santa body. After that cut a 1.5″ strip of fabric and glue at bottom of Santa doll body sandwiching the body between the fur on a fold.
Santa Claus Doll – Step 3
Next you are going to cut out your Santa’s Hat. Cut out a 6″X6″ square of fabric. Then cut the top on an angle as shown in the photo above.
Santa Claus Doll – Step 4
Now place your Santa hat pretty sides together. Either sew or glue the angle closed as shown above.
Santa Claus Doll – Step 5
Then turn hat pretty side out. Cut a strip of fur 1.5″ and fold in half. Sandwich fur in hat and glue in place.
Santa Claus Doll – Step 6
Next you are going to glue on your Santa’s hat and beard/hair onto the doll.
Santa Claus Doll – Step 7
Finish decorating your Old World Santa Doll from the United States by gluing the rusty snowflakes, greenery, and cinnamon sticks in place.
Lasse Claus Doll – Step 1
The last Father Christmas Doll we are going to make is Lasse Claus from Finland. Start your doll by gluing its head onto the cone. Then cut an 8″X4.25″ piece of fabric for Santa coat. Drape coat over cone and glue in place.
Lasse Claus Doll – Step 2
Glue the extra fabric to the bottom of the inside of the cone.
Lasse Claus Doll – Step 3
Now you are going to glue a gold ribbon stripe down the center of your Lasse Claus’s body. Then cut 5 pieces of 1″ ribbon and then glue them in place as shown.
Lasse Claus Doll – Step 4
You are now going to cut out a 7″ x 5″ piece of white faux fur for the cape. Fold the piece of fur in half and then cut it to make a slant as shown above. Make sure you cut the part that isn’t folded.
Lasse Claus Doll – Step 5
After cutting out your cape you and go ahead and glue it onto your Lasse Claus.
Lasse Claus Doll – Step 6
For your hat cut out a 6″ x 6″ square of white fur. Then make your square into a trapezoid looking shape as shown above.
Lasse Claus Doll – Step 7
Now you are going to fold fabric pretty sides together in half. Sew or glue upper curved area.
Lasse Claus Doll – Step 8
Next you are going to turn your hat pretty side out. Glue under 1/4″ to form a hem on curved edge of hat. Glue your hat into place onto your Lasse Claus
Lasse Claus Doll – Step 9
Finally add all of your finishing touches! Glue a bow on top of the hat, gold ribbon down side of the cape and a beard and hair onto your Lasse Claus Doll.
You are now finished all of your Father Christmas Dolls! I hope you enjoy displaying your Viktor Claus, Santa Claus, and Lasse Claus dolls this Christmas.

PIN IT FOR LATER




Leave a Reply